One of the most common beginner mistakes made by video creators is to treat the audio component of their work as either a secondary consideration or worse a complete afterthought. In particular, the rise in use of DSLR and bridge cameras for video production has seen many shooters simply relying on the very poor onboard audio facilities of these devices for audio capture, with often dire results. The simple fact is that poor audio can ruin a video production far more easily than poorly shot video because viewers notice poor or incongruous sound far more readily than visual errors.
Why is audio quality so important?
There are a number of reasons why paying attention to your audio capture and post-production is so important. In the case of footage which relies heavily on spoken word content, such as corporate video, documentary, TV drama, or newsgathering, audio tracks will carry just as much, if not more key information than visual elements; and, put simply, you can’t understand what you can’t hear! A good example of where this simple principle was forgotten, is the otherwise lavish and well-produced 2014 BBC adaptation of Daphne du Maurier’s Jamaica Inn, which was slammed for containing vast swathes of completely incomprehensible dialogue between key characters. OK, in this case, the issues were down to deliberate, though highly questionable production decisions, which prioritised dramatic effect over intelligibility, rather than being the result of poor technical management. However, the point is that if a high-value mainstream TV drama can be spoiled by inaudible dialogue, production at the level of us mere mortals can certainly suffer.
Perceivable clarity isn’t the only issue that we have to be aware of with audio, however. Way back in pre-history, when we existed in a far more hostile environment than we enjoy today, perceiving, identifying and accurately placing the origin of both potential prey and potential predator sounds became key to survival, and, as a result, our hearing evolved to be highly sensitive to even slightly conflicting audio information. Even though our survival no longer depends upon us having a clear and information-rich audio image of our surroundings, we are still very sensitive to audio artifacts which don’t fit our expectations. A good example of this is when poorly managed room reverb somehow destroys the intimacy of an interview, because it simply doesn’t fit with the nice, tightly contained shot we see on-screen. Other issues such as poorly normalised audio, unwanted noise, or the overuse of equalisation and dynamics processing in post-production also cause listener discomfort. In short, there’s no shortage of opportunities to screw up! Last, but by no means least, audio misdemeanors are notoriously problematic to correct and frequently result in a cure that’s worse than the original disease.
In this post, I’ll offer you some basic guidelines, which will help you to capture and post-produce better audio for your corporate video productions.
Treat audio capture as a full-time responsibility.
If you were working with a major production crew, it’s likely that you would have a small team of people responsible for managing the audio content of the shoot: a boom mic operator/s to manage mic placement throughout a shot, and a sound mixer, who might be managing signals from a number of sources, monitoring audio quality while ensuring a good balance between sources is maintained. For smaller production environments, such as corporate video production, it’s not uncommon for the team to be just a pair of operators or even a solo shooter. Regardless of the size of your team, ensuring that audio quality is maintained is essential. If, for example, I was working with a second shooter, I would probably allocate audio monitoring to them, along with managing a locked-off master camera, meaning that they were able to dedicate virtually all of their attention to sound.
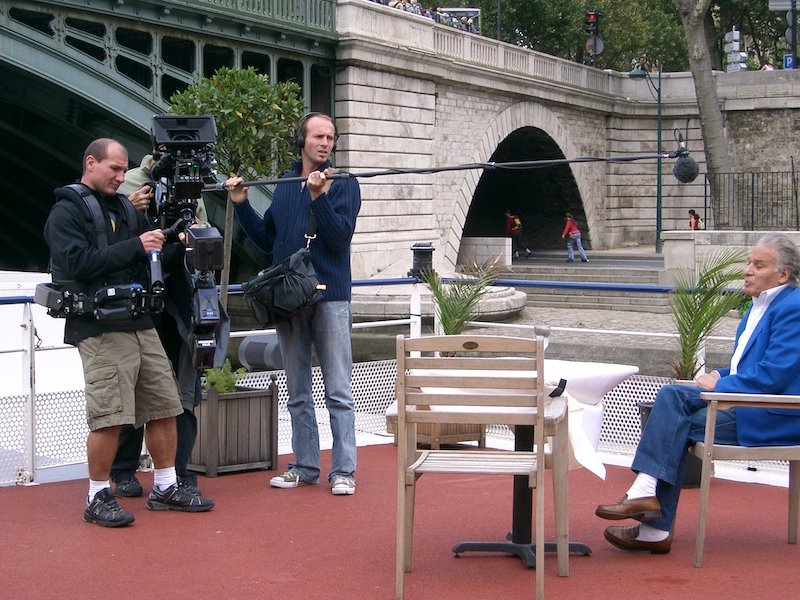
In larger crews, the sound is often handled by a dedicated person or small team.
Most of the time, like many other grassroots videographers, I work alone due to budgetary constraints, which means that I need to organise my workflow to ensure that I’m able to monitor audio effectively throughout a shoot. For corporate video work, which commonly involves interviews, I normally shoot with two main cameras (one set for a medium, head and torso view and the other for closeup/alternative view) along with a third camera on a slider set to automatically cycle back and forth. This means that, for the most part, my cameras can be left untouched throughout the shoot. While my slider camera is a fairly lightweight bridge camera, my main units are good old-fashioned camcorders, with dedicated, pro-quality audio inputs and preamps, phantom power, several hours of reliable battery life and unlimited single shot record time. My master camera captures audio from either one or two wireless mics, while my second camera will normally capture audio from an overhead condenser mic, for backup. I also ensure that one of the two audio tracks on the main cameras is set around 12db lower gain than the other, ensuring that if my talent gets a little shouty, I have a lower level backup to call upon. The audio from my master camera is monitored over headphones throughout the shoot so that any problems are identified early in the process.
On the subject of headphones, choose a good pair of closed-back, extreme isolation headphones, of the kind used by DJs, as these will help you to hear what’s going to camera, warts and all, well above any external sound that reaches your ears. Please don’t confuse these with noise-canceling headphones, which are designed to filter out unwanted noise from the signal chain, that you really need to know is there! Good examples of isolation headphones are Sennheiser HD 380 Pro or Audio Technica ATH-MX50, both of which are frequently used for location video recording and which can be purchased for around £100 a pair.
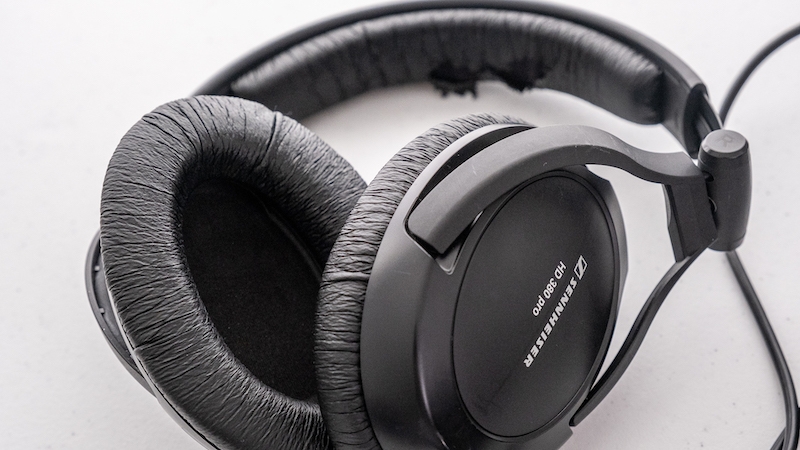
Good closed-back or ‘extreme isolation headphones are essential to monitoring audio during a shoot. These should not be confused with noise-canceling designs, which could filter out a lot of ambient sounds that you really need to hear.
Understand and if necessary, modify the shooting environment.
If you have time, always scout your shooting environment prior to filming. This helps to identify any number of potential practical issues such as available power supply for lighting gear and any health and safety issues that might exist. In respect of sound recording, a quick site visit enables you to assess issues such as room reverberation, external traffic noise, noise from adjacent offices, a rattling aircon unit or a noisy fridge. If you know about these things in advance then you stand a chance of being able to do something about them: scheduling the shoot for a day or time when external noise is less of a problem, finding the switch for the aircon or fridge, hanging a few heavy drapes and/or laying a nice thick rug to help tame room acoustics.
Make the right gear choices: horses for courses.
OK, let’s get it out of the way: never use the built-in mics on your camera! Regardless of any claims made by the manufacturer, they’re completely inappropriate for the task at hand! This is primarily because regardless of their inherent quality (or lack thereof), as a general rule we need our mic as close to the sound source, our talent, as possible, which is difficult if it’s attached to a camera. In addition, the mics that are built into your camera are rarely, if ever, of any quality, having only a tiny percentage of attention or budget given to them during design and manufacture. Use the best quality external mics that your budget allows and connect them with either good quality cable or via a reliable wireless system.
If I was starting out, my first choice of external mic for corporate video work would probably be a small diaphragm condenser mic as even modestly priced units (£75 – £100) will yield excellent, natural-sounding results. They also have a directional or cardioid pickup pattern, with good off-axis rejection, which, put simply, means they pick up more of what you point them at and less of everything else, which is a good thing for audio recording of any kind. I frequently use an SE Electronics SE7, mounted on a good quality shock mount, boomed in front and above my talent, and obviously out of shot.
My next choice of mic would undoubtedly be a decent quality lavaliere/tie-clip/lapel mic (many names one thing) and I’d almost certainly go for wireless connection rather than wired, simply because, unlike an overhead, the mic is attached to a moving object, i.e. your talent, which can lead to some unwelcome and expensive accidents with cables if you or they forget to remove the mic before getting up and walking around. A lav mic gets you in close to the sound source, usually 20-30cm, thereby giving an excellent quality signal, with little background noise and can be placed upon your talent very discretely. If you’re in a particularly noisy environment, such as a trade show or festival, a lav mic is an obvious choice as its proximity to the talent gives a very high signal (desired audio) to noise (everything else) ratio or SNR. When it comes to wireless equipment, it really is a case of getting what you pay for: a camera mount Sennheiser G4 system won’t give you much change from £500, but it will be extremely reliable, have very low self-noise, and will last for years.
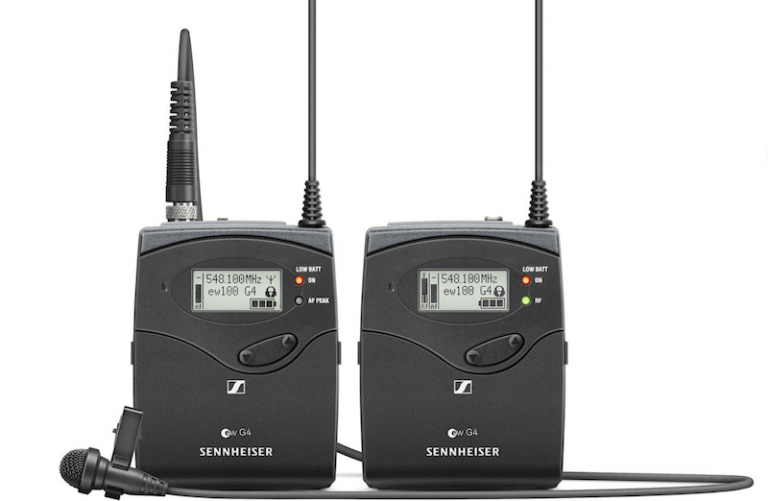
Sennheiser G4 wireless system with ME2 lavalier mic. Reliability and quality in abundance. Standard kit for small productions.
It is also very useful to have a decent shotgun mic in your arsenal, which is a highly directional (super-cardioid) mic, ideal for outdoor and larger interior use because of its very high level of off-axis rejection. They’re also excellent for situations such as run-and-gun style interviews at trade shows or festivals, where you don’t necessarily have time to deploy lav mics. Shotgun mics are often used in newsgathering, mounted on a handheld shock mount, which can either be managed by the interviewer or handed to the interviewee. One unfortunate issue with shotgun mics is that they’ve become something of a go-to mic for all situations among many videographers and if used in the wrong kind of acoustic environment, i.e. smaller rooms they can produce rather nasty ‘comb filtering’ effects, due to their design, resulting in very thin, somewhat harsh audio recordings.
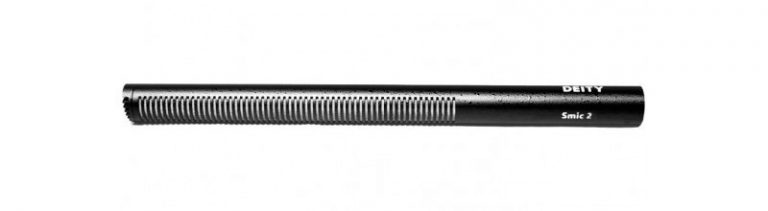
Deity S Mic 2 shotgun microphone.
If you’re shooting with DSLR cameras, always use a separate audio interface with decent mic preamps, or alternatively record your audio separately and then sync it to the video in post. As stated above, the internal mics and preamps on even the best DSLRs are generally an afterthought and consequently not of the quality you really want for decent production work. When I do shoot video on one of my Fuji still cameras, I route audio through a Tascam DR-60D, which has nice enough preamps and XLR inputs, allowing good quality balanced line mic cables to be used. It also delivers phantom power, which is a must for most condenser and shotgun mics. In addition, I record a backup audio track on the Tascam, which has saved my life more than once. The unit also attaches to the base of a camera using the tripod socket or can easily be mounted on a camera cage. There are numerous devices of this kind available to suit all kinds of budgets and I’ve heard particularly good reports about Zoom Audio products for DSLR audio capture.
If you’re working outdoors use a deadcat (furry windshield) or even a blimp (windshield shaped like a torpedo) to cut down on wind noise as this can absolutely destroy otherwise good audio. Use decent quality shock mounts to help cut down handling noise or camera noise if you are camera mounting a mic. Use good quality cables of an appropriate length, as the longer cables are, the more noise they pick up from background radio frequency interference. Always check your gear before a shoot and take spare batteries and cables.
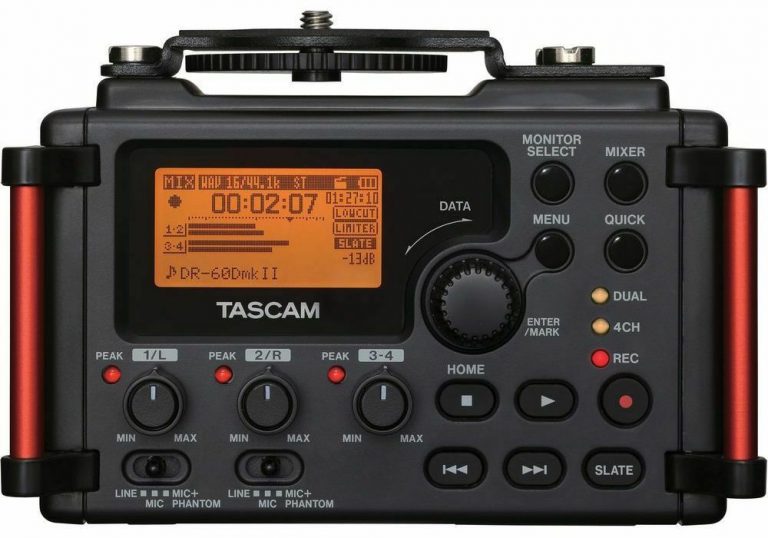
An external field recorder, like the Tascam DR60, is the preferred method for recording audio when shooting with a DSLR.
Setting the scene
While most of the corporate video work I do is based around interviews with an organization’s key players, I invariably record B-roll of the business operation concerned to help contextualise the discussion. Making sure that you record the audio for this appropriately is also very important, as again, viewers will be put off by odd-sounding audio on cutaway shots, just as much as for the main event. You may even want to use ambient audio as a king of punctuation tool during transitions or FTB sections of your finished video, so taking care to record it well pays dividends.
Voiceovers
There will inevitably be times when your corporate video work requires a Voiceover track, either in addition to or instead of live audio. If this is the case, I’d always advise treating the recording of a Voiceover as something separate from the filming scenario. To begin with I’d be tempted to have at least a rough cut of my finished video available in order to ensure that my Voiceover script matched, making changes to the script where necessary.
Next, I’d prepare a suitable recording environment. Assuming that you don’t have a dedicated professional vocal booth at hand, a perfectly adequate solution can be improvised with a quilt or heavy blanket and a few mic or lighting stands. The idea is to create, as far as possible, an acoustically neutral or dead environment around the mic. Simply hang the quilt to form a kind of cave, enclosing the mic at the rear, sides and top, and if you’re working in an uncarpeted room, lay a rug below your working area. This will reduce room reflections to a minimum and give a nice intimate sound to your voiceover.
In terms of mic choice, I’d be tempted, budget permitting, to use a large-diaphragm condenser mic of the kind commonly used to record vocalists in the music industry. This will give you a rich, transparent sound with both high-end sparkle and resonant bass. Always work as close to the mic as is comfortable, in order to take advantage of the ‘proximity effect’, which gives additional richness and helps even the thinnest sounding voices to croon a little. When working in close proximity to a mic, you should always use a pop shield to help reduce plosive p and b transients. A good alternative to a large-diaphragm condenser is to use a shotgun mic, again with its foam pop shield on, as shotgun mics also benefit from the proximity effect. Because you’ve hopefully killed off most of your room reflections, you won’t have to worry about comb filtering.
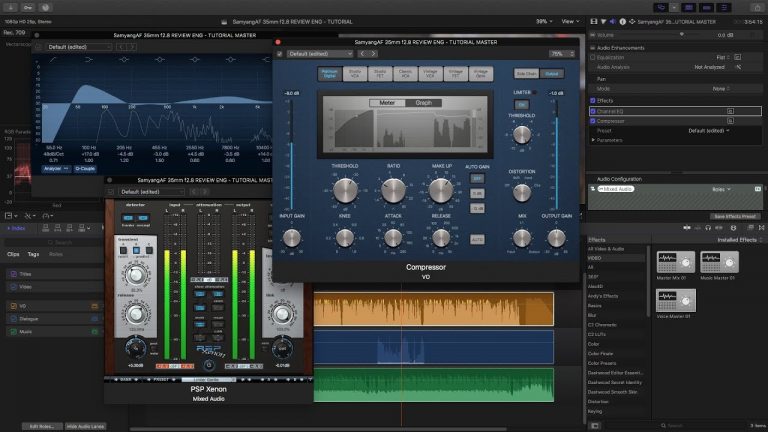
An abundance of audio tools is available for post-production, but these should be used sparingly.
Audio post-production: less is more
In audio post-production, probably the best advice I can give is never overdo anything. In fact, I find it good practice to get the equalisation (treble, midrange, and bass balance) and any dynamics processing just how I think I want them….. then back everything off by about 30%. It’s amazing how often this simple practice has stopped me from unleashing over-processed, unnatural sounding audio on the world. The same rule applies to stereo or surround imaging, in terms of avoiding extreme and unnatural placement of audio elements in the soundscape.
Ensure that the sound between clips is matched as closely as possible, or ‘normalised’, both in terms of any processing applied and more importantly in terms of volume. There’s nothing worse than wildly varying volume levels between scenes or worse between shots within a scene.
Always post-produce audio as a separate task rather than during general editing. I generally leave audio until the end and remove as much non-audio related material from my computer workspace as possible. Even then, I find listening with my eyes shut really helps me to concentrate on the audio material and to spot any issues that are present.
Make sure you listen over a good pair of flat sounding speakers or open-backed reference headphones. Sorry, but the latest offering from consumer audio manufacturers is unlikely to be even remotely adequate, as this equipment is invariably over-hyped in particular audio frequency bands to make it sound exciting. Similarly, the headphones you use for monitoring audio during capture are unlikely to have a particularly flat response, so you’ll need another pair.
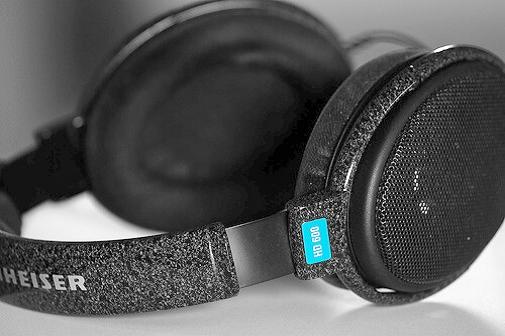
Sennheiser HD600 reference headphones, open-backed, flat frequency response and very true sounding. Also comfortable enough to wear all day long. Ideal for post-production audio monitoring.
If you’re using music in your corporate video production, it should go without saying that you need to get usage permission or to ensure that the track/s you are using are available under Creative Commons license. YouTube has an excellent library of free to use music, or alternatively you can purchase music under license from sources such as Artlist, Epidemic Sound or Soundstripe. When mixing a music track with recorded audio, it’s crucial to remember that, regardless of how wonderful the music track is, the voice recordings must always take precedence. Always use instrumental music as any lyrical content will distract from the information contained in the recorded audio. Adjust or ‘duck’ the music track to allow spoken material through, either manually or with an automated plugin such as Crumple Pop’s Clear Voiceover. A great sound engineer’s trick is to listen back at very low volume, to ensure that spoken material is getting through over any background audio. Conversely, try to avoid working at high volumes as everything sounds good when it’s slamming you in the face.
Take a break
Just like any other faculty of your brain and body, hearing becomes fatigued over time, so take an overnight break once you think you’re finished, then listen back again, you’d be amazed at how much you notice after your ears have had a chance to relax.
Mooma Media offers a range of video production services to individuals, small businesses and not-for-profit organisations operating in the West Midlands region. Mooma offers competitive quotes to produce website or social media marketing videos and to film or live-stream events. To find out more about any of Mooma Media’s services, use the contact button below.]
Stourbridge-based Mooma Media offers event audio-visual support, event filming, live-streaming, video production, and still photography services to businesses, the public sector, and other non-commercial organisations throughout the Black Country and the wider West Midlands region. To discuss your project, or for a competitive quote click the button below.
Comments are closed