
Getting great results when shooting headshots, environmental portraits, and corporate teams, can be tricky; but not necessarily for the reasons, you might expect.
If someone is running a small to medium-sized business, there are a number of reasons why they might want photos of themselves or their team. Corporate portraits are ideal for organisation websites, social media posts, printed marketing materials, and wall art for business premises. But good corporate portraits can be quite a challenge, even for an experienced photographer; not particularly because of technical concerns, though there are a few, but mainly because of dealing with people who are placed in an alien situation. If you ever find yourself needing to capture a number of corporate portraits for an organisation, there are a few simple principles that will go a long way towards making the whole experience more successful and less stressful for all concerned.
Camera and lens combo:
You don’t need to have the latest and greatest camera to successfully capture portrait images, but having a decent, wide-aperture lens will help a great deal. A wide aperture, f2.8 or wider, helps maximise the potential of available light, while also giving you the opportunity to separate your subject from the background by throwing it nicely of focus. But be careful if using extremely wide apertures such as f1.2/f1.4 as focussing becomes more critical.
In addition to choosing a lens with a decent aperture, it’s also quite important to ensure that your lens choice allows you to frame your subject nicely at a suitable distance. Get too close with a wider angle lens and you’ll start to create visual distortions such as enlarged noses. A classic portrait focal length is 85mm on a full-frame sensor, or around 53mm on an APS-C sensor. If using a zoom lens, such as a 24-70mm, be sure that it’s capable of maintaining a decent aperture at its long end.

Using a shallow depth of field to throw a background out of focus is a standard portrait technique, which requires a large aperture lens.
Getting the background right:
Although I’ve talked about using a shallow depth of field to throw a background out of focus, your background will still be there and it should be as simple and uncluttered as possible, so as not to create too many distractions from the main event, your subject. On the other hand, the background can be an integral part of many corporate portraits, giving important clues as to the nature of the organisation or the status of the subject within a company, and so on. If you want to keep the background sharp, you’ll need to be even more careful about what it contains.
As with any other kind of photography, always pay attention to the whole frame, particularly the edges, as its all too easy to put all of your concentration into the subject, thereby not noticing the fire extinguisher or the noticeboard in the background, which might spoil an otherwise great shot. It’s always worth scouting out suitable backgrounds before the shoot begins, if you can, or tidying up an area if it’s cluttered. Paying a little attention early on can save you a lot of time in post-production.
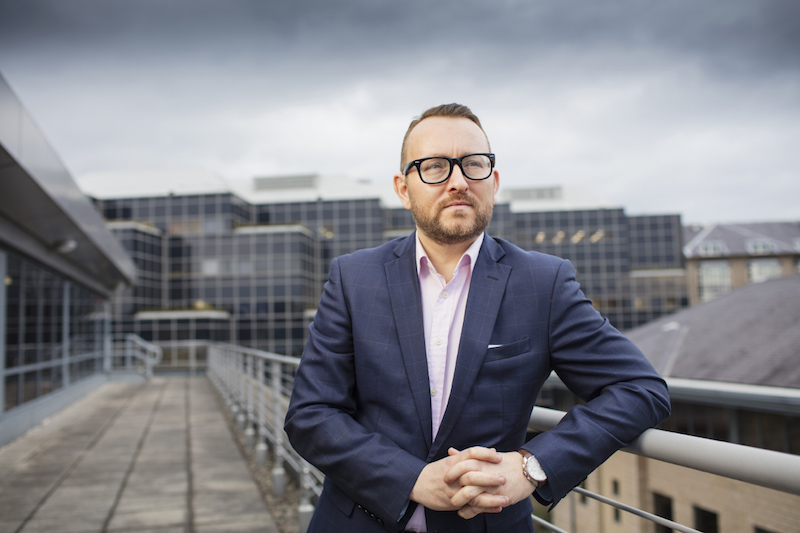
Sometimes, the background of a corporate portrait says a lot about the subject.
Let there be light:
If you’re lucky, you’ll be working in an environment with either abundant natural window light or well-designed, consistent artificial lighting, which will provide nice soft, even lighting and flattering gentle contouring on your subject’s features. But there’s a very good chance that you’ll be in a dimly lit office, with a mixture of spartan fluorescent and LED lighting of different colour temperatures.
My first step when entering a corporate environment is to assess what lighting is already there, what I can use, what colour the lighting is and where it’s switched off. Once I’ve done this, if necessary, I’ll begin adding my own artificial lighting, which is normally of the continuous variety rather than flash, as I find this helps me get a more realistic idea of what I’m going to get in-camera. Finally, I’ll think about what can be achieved with reflectors to fill in any unwanted shadows.
When using photographic lighting for portraits, always remember that soft lighting is infinitely more flattering than harder lighting, so remember to either bring softboxes and scrims or be prepared to bounce your lighting to achieve the softest results possible.
I always find that balance is the key to effective environmental lighting, ensuring that any emphasis on the subject created by lighting is subtle and that the background doesn’t become overly dark by comparison. I’m similarly keen to ensure that facial contouring created by shadows isn’t too contrasty or moody in this kind of work as I don’t really think this type of lighting suits the corporate market.
Move your feet:
One of the most important lessons I learned from my college photography lecturer, way back in the 80s, is that your position is one of the most powerful creative tools at your disposal. Simply changing your viewpoint by even a few inches in any direction can make or break a great photo. Don’t be afraid to move around a little before even lifting the camera to your eyes, considering your relationship to the subject and your subject’s relationship to the background as you do so.
I’m also a fan of exploiting elevation in environmental portrait images and I normally take an adjustable height aerobics step to shoots, so that I can raise or lower either myself or my subject by just a few inches if I need to. A fold-up stepping stool or even a small step ladder can also be invaluable, particularly for group shots, reducing the problem of hidden faces, by shooting the group from above. Even individual portraits can sometimes benefit from an elevated perspective, as lower-level elements can then feature in the background. One of my regular clients likes to show off an attractive stained glass window in the background of some of their corporate portraits, but unfortunately, it’s quite a way off the ground, so both myself and my subjects have to stand on tables to get a decent angle. Just remember to always be health and safety conscious when raising yourself or others off the floor.

Shooting a group from slightly above can help to ensure that everyone is seen.
You’ve been framed:
There are no hard and fast rules to framing a subject. OK, there are tried and trusted methods like the rule of thirds, but treat these ideas as your starting point, rather than as some kind of dictum. Experiment and if time allows try a few ideas. Unless your photos are going to be used for a very specific purpose, its always worth giving your subject plenty of space in the frame, to allow for cropping to different aspect ratios, as your images might end up in a number of settings. I’d also be tempted to shoot both portrait and landscape versions of each individual for the same reasons. This will cost you very little in terms of time and will add apparent value for your customer. Likewise, I always shoot a variety of simple, stock poses, that I can pretty much guarantee will work, again, so that I can deliver a variety of photos of each subject.
Rapport is everything:
The modern selfie obsession and part-time careers in modeling aside, most of your subjects will be unaware of how to pose appropriately. Many will be camera shy and some positively camera phobic. The danger is that if you don’t build some kind of rapport with your subjects, getting the best either from them or from yourself will be difficult. Having a little patter and spending a little time to help put people at ease, before you even raise the camera to your eye, will pay dividends. Continue chatting as the shoot progresses, ask them about their role in the company, where they got their tie, how they find their boss to work with, anything to help maintain a relaxed atmosphere. Not only will the shoot be less stressful for all concerned, but you’ll also get far better results.
Try to refrain from pursuing any poses that the subject is clearly unhappy with and always ask permission before touching the subject in any way whatsoever, to manipulate their position. Try both smiling and more serious facial expressions, again, giving your client a choice. Be aware that some individuals have a somewhat distorted sense of reality when it comes to how they perceive themselves and seeing their image captured formally can come as a little bit of a shock. If they ask to see their image and aren’t pleased, simply give them another go; in my experience, they’ll always be happier with subsequent snaps, even if you struggle to tell the difference.
Once you’re underway, try to work steadily and avoid getting your subjects to hold poses for too long as they’ll find this awkward, adding to their general discomfort. This will also show through in your photos, as they will feel stiff and unnatural. Making sure you have your technical life sorted, i.e. DOF, exposure, lighting, etc, before you invite your first subject for a photograph, is important for managing everyone’s stress. If you have an assistant get them to stand in for test shots; if not, find a member of the client organisation’s staff, who doesn’t mind a few extra moments away from their desk.
Be aware that many of your subjects will have been enjoying or maybe enduring a normal working day, prior to your arrival, and so having the chance to check hair and makeup prior to being photographed will win you a lot of friends. Carrying a mirror to shoots may seem a little OTT, but it works wonders for building confidence.
It’s also a good idea to use an external monitor or laptop to view and check your images on a larger scale as you work, as this helps to reduce the possibility of callbacks, which do nothing for your reputation. Having a large view of each shot, that can be shared instantly with the subject or with your client also shows a degree of confidence and professionalism.
You’re the boss:
It’s important, from the outset, to establish yourself as being in charge. This doesn’t mean that you need to be curt or domineering, but you do need to establish your presence and your expectations as soon as possible, otherwise, things can get a little chaotic. Nowhere is this more applicable than when doing group shots, where you should ensure that eyes and ears are firmly focussed in your direction and that nervous chatter, wisecracks, and any other shenanigans are kept firmly under control. An effective trick for this is to show no signs whatsoever of raising the camera until you’ve got everyone’s attention, and then lowering the camera again if the focus of the group wanes for any reason. A simple, passive gesture, but everyone will quickly cotton on to what’s happening. Individual shots can also be interrupted, more often than not by individuals, who have already taken their turn, baiting colleagues in front of the camera. Having model release forms ready for everyone to complete in a different location helps in this situation, as you have a good excuse to move people on.
If you have a larger number of subjects for individual or smaller team shots, it’s a good idea to establish a logical and efficient workflow, enlisting the help of a member of the client organisation’s staff to assist, as they’ll know who’s who and where to find them. This is no different from enlisting the assistance of the Best Man at a wedding, to do the job of assembling different groups of people for photos. These steps will help to establish a reputation for experience and professionalism, worth its weight in gold, for both repeat commissions and word of mouth publicity.
Take your time, working calmly, carefully, and methodically: no one is impressed by a slick, exuberant operator falling flat on their face when they get it wrong! Be realistic about schedules and don’t let yourself become unnecessarily pressured, as you’ll inevitably pass your anxiety onto everyone else. Above all, keep your cool and keep smiling; remembering that this is probably quite nerve-racking for many of those involved and the last thing they need is a grumpy so and so barking orders at them.
Stourbridge-based Mooma Media offers event audio-visual support, event filming, live-streaming, video production, and still photography services to businesses, the public sector, and other non-commercial organisations throughout the Black Country and the wider West Midlands region. To discuss your project, or for a competitive quote click the button below.
Comments are closed