Three-point lighting is used by photographers, videographers, and cinematographers the world over. It’s popular because we can use it in so many situations, with desirable, and predictable results. Three-point lighting also gives us a lot of scope for creativity, within well-established parameters.
There are definitely other lighting schemes that work well for both still image and movie makers. However, three-point lighting is one of those things that we should all learn as part of our craft. For photographers and filmmakers, learning three-point lighting is a little like a musician learning scales and arpeggios; unavoidable!
Learn more about my promotional photography services and video production services for businesses, public sector bodies and third sector organisations in the Black Country, and West Midlands region.
How does three-point lighting work?
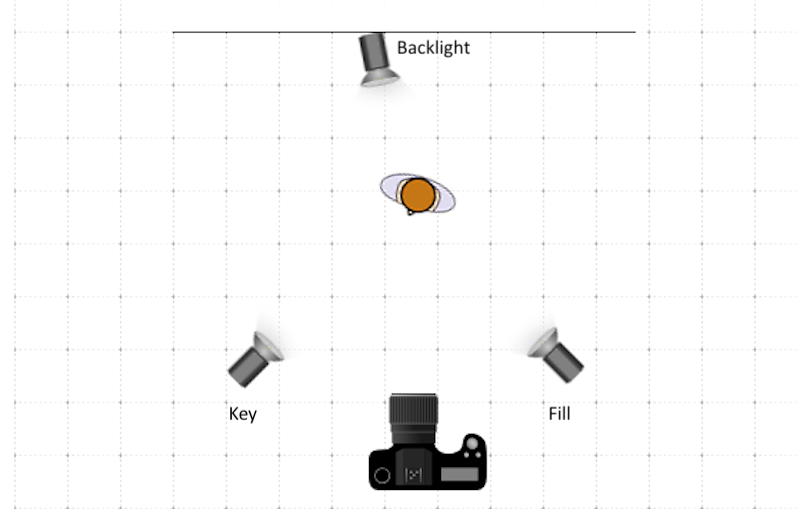
As the name suggests, for three point-lighting we use three lights:
Key light.
The Key light is our main source of light, and we use it for illuminating the main subject and setting our exposure. We also use the key light to create areas of shadow, giving depth and solidity to our image. A shot created with the key light dead centre can create a very flat effect. Therefore, in most circumstances, we place the key light off to one side and above our subject. A good starting point is 45 degrees to the lens in both vertical and horizontal planes.
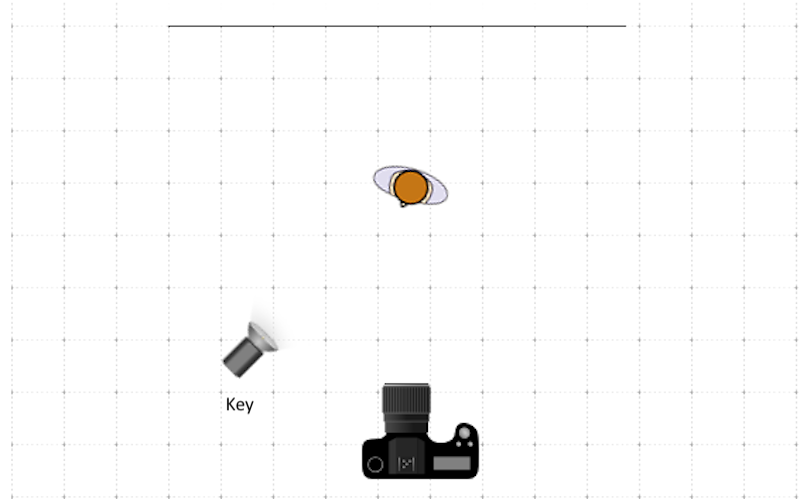
The key light is the main lighting source and is used to se exposure and the overall mood of the image.
This 45-degree placement will work in many circumstances and is an excellent, guaranteed formula for effective three-point lighting. However, moving the key light around can change the mood of a scene, sometimes quite dramatically. For example, a key light coming from beneath a person’s face can make them appear quite sinister.
In addition to changing the angle of the key light, we can also change the quality of light it produces. Directional light will give us hard, deep shadows and a very dramatic effect. Diffused light, on the other hand, will give us a much softer, more flattering, wrap-around effect.
Our Key light sets the overall design and exposure for the shot.
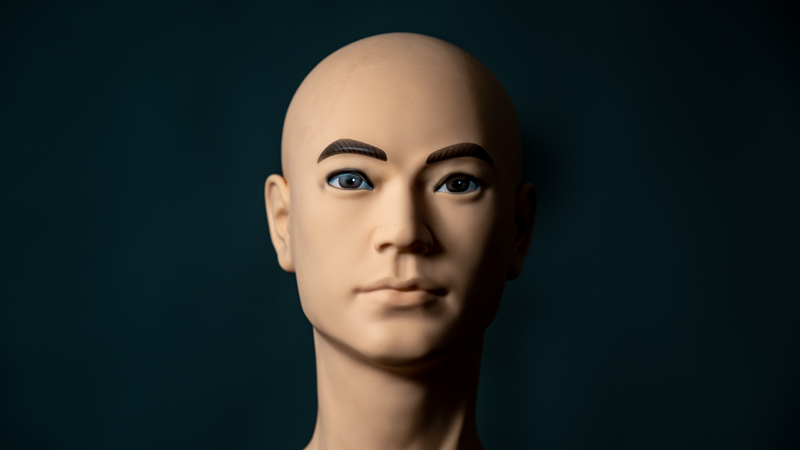
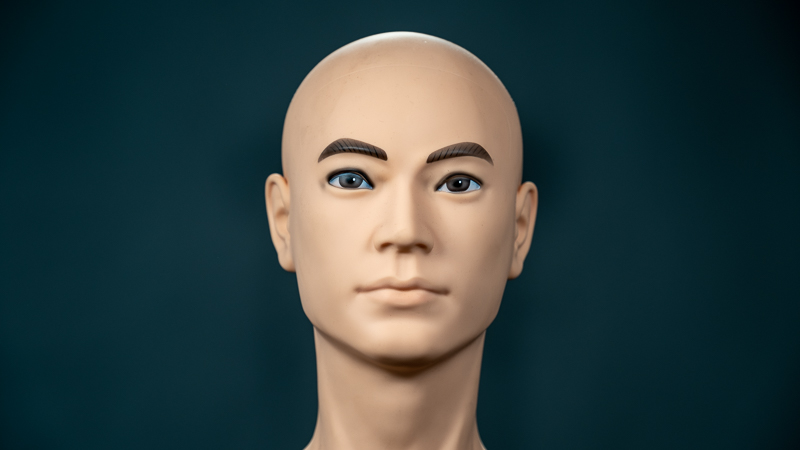
We now have single-point lighting. Single point lighting is very unnatural because we’re used to light bouncing off the surfaces around us. To make our lighting a little more natural we now need to bring in a second light source.
Fill light.
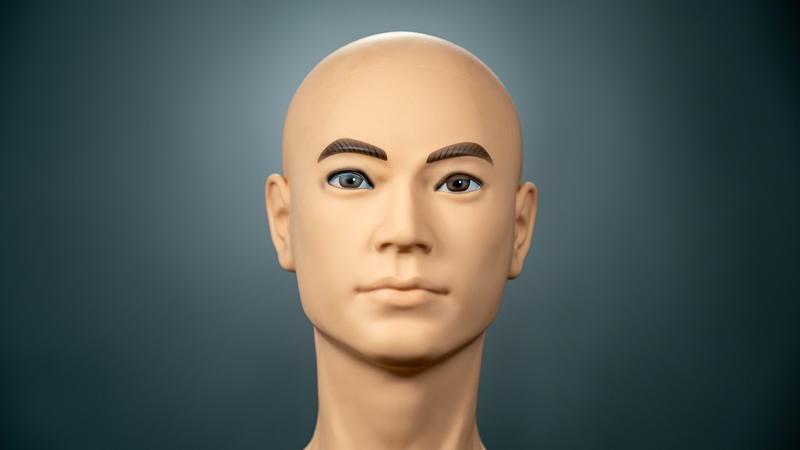
Having established the main exposure and modelling with our key light, we can use a fill light to create balance. The fill light gets its name because it fills the deeper shadows on our subject. This helps us to imitate more natural lighting, which bounces of the surfaces around us. Filling out the shadows on a subject also helps us to create a more flattering image than single-point lighting.
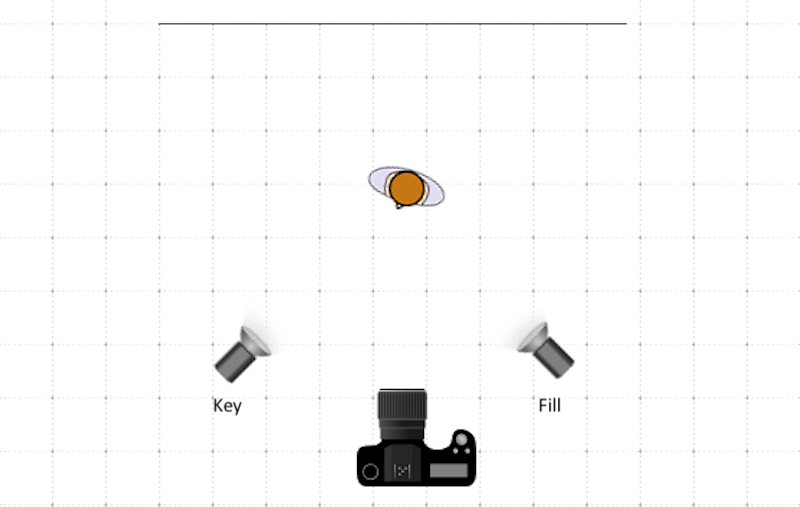
A fill light is set up on the opposite side to the key light and balances the key light, filling shadows.
Sometimes, we don’t actually use a light at all for our fill. We use a reflector instead, to bounce some of our key light in the opposite direction. This could be a sheet of white card or even a white wall. We can also add subtle colour with a coloured reflector used as a fill source.
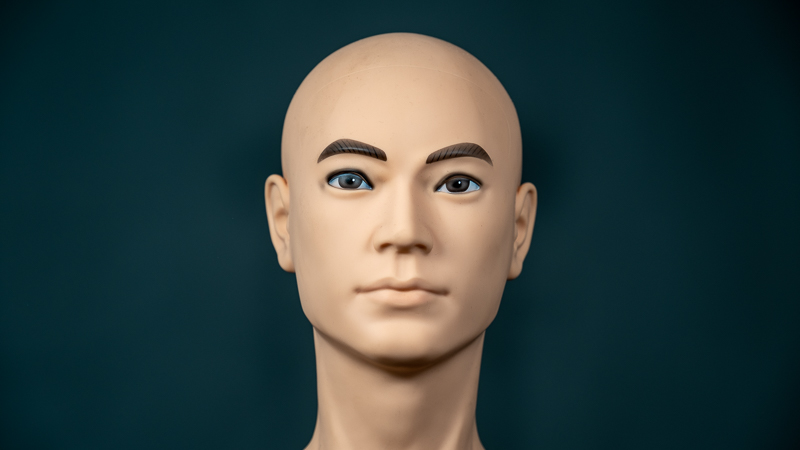
Our fill light helps to balance the key light but is usually not as bright to preserve a sense of shape and depth.
Our fill light isn’t usually as bright as our key light. This enables us to maintain a sense of depth in our image. However, we can change the character and mood of our shot by altering the balance, or ratio between our key and fill lights. For example, lots of key light and very little fill is more dramatic.
Backlight (AKA rim light, kicker, or Hair light).
The third light in our three-point setup is known by several names. It helps us to separate our subject from the background, again adding depth to our shot. As the name suggests, we use the backlight to illuminate our subject from behind.
Finally, the backlight/hair-light/kicker/rim-light completes the setup and separates the subject from the background
Backlighting creates a halo effect (rim) around our subject. Just like the other lights in our three-point lighting setup, we can vary the intensity or direction of our backlight. Again, this helps us to alter the mood of our shot. Extreme backlighting, for example, will create a partial silhouette, which can be very dramatic.
Adding a backlight helps to separate the subject from the background, giving our image more depth.
Why use three-point lighting?
As with anything else in photography or filmmaking, there are no hard and fast rules. However, as already stated, there are some principles that can really help us to get the job done.
Three-point lighting really helps us to create a sense of depth, shape, and mood in our shots. In addition, it can help us to flatter our subjects by softening shadows caused by lines, wrinkles, and other blemishes. Experimenting with three-point lighting, by changing angles, proportion, and lighting quality, can give us almost unlimited variety. We can also use three-point lighting as the starting point for more elaborate setups, lighting our background and adding practical lights, for example.
It isn’t always practical or even desirable to use three-point lighting. Run and gun assignments and other very dynamic situations may make it impossible, for example. However, as you develop your craft as a photographer or filmmaker, learning to master three-point lighting will be essential.
Three tips for perfecting your three-point lighting technique.
1. Always know how you want your lighting to look and why.
This will help you to set the position, balance and quality of your lights from the word go. You may just want a simple, classic 2:1 key to fill ratio, with diffused lighting for a corporate talking head or portrait photo. Alternatively, you may want to create a sense of drama for a band shot or music video, with harsh, high contrast lighting. The two moods and therefore the two lighting setups aren’t interchangeable.
2. Experiment with variations on your three-point lighting setup.
Now that you’ve established the motivation and style for your lighting, try variations to get exactly what you want. Move your key, fill, and backlights around to alter the direction of your shadows. Experiment with softboxes, umbrellas, scrims, and reflectors to change the quality of your light. Change the balance between the three lights to change the mood of your shot. Try adding a fourth light on the background, behind your subject’s head.
Once you have mastered the concepts behind three-point lighting, there are endless variations and additions that you can try.
We can expand on classic three-point lighting, by adding a background light, for example.
3. Keep notes.
As you experiment, take notes or draw diagrams of what you’ve done. Alternatively, take quick snaps of each of your setups for reference. Measure distances and angles to help you replicate each setup quickly. Eventually, lighting effects and the setup required to get them will become second nature. However, while you are learning, you really don’t want to start from scratch every time you light a new shot.
Available light and three-point lighting.
Three-point lighting doesn’t necessarily involve artificial lights. Window lighting can sometimes provide suitable key light, for example. Coupled with appropriate reflectors for fill and backlighting, natural light may be all you need. Alternatively, you might use just one or two artificial lights in your setup, with natural light providing your third light. However, moviemakers should remember that natural light can change very quickly, so a scene could be ruined by the unexpected passage of a cloud.
Acknowledgement
All lighting diagrams were created using the Online Lighting Diagram Creator.
Stourbridge-based Mooma Media offers event audio-visual support, event filming, live-streaming, video production, and still photography services to businesses, the public sector, and other non-commercial organisations throughout the Black Country and the wider West Midlands region. To discuss your project, or for a competitive quote click the button below.
Promotional photography and video production in and near:
West Midlands county: Birmingham, Solihull, Sutton Coldfield, West Bromwich, Dudley, Walsall, Wolverhampton.
Staffordshire: Lichfield, Tamworth, Stafford, Cannock,Burton upon Trent.
Shropshire: Telford, Shrewsbury, Bridgnorth, Kidderminster, Ludlow.
Worcestershire: Bromsgrove, Reditch, Droitwich, Worcester,
Warwickshire: Warwick, Stratford upon Avon, Leamington Spa, Coventry, Nuneaton,
Comments are closed