Introduction
One of the most common failures on the part of rookie video creators is capturing really poor audio, because of basic misunderstanding regarding how sound, and the equipment they’re using to capture it, actually work. While technological improvements to consumer-grade cameras have brought, at least the illusion of, foolproof video capture; the fundamental physical characteristics of sound have, by and large, precluded any quick and easy, in-device solutions to good audio capture. In short, good audio recording for video, or any other purpose, relies on some understanding of how sound propagates in an environment, how our ears perceive sound and how different devices can be effectively deployed to capture it effectively.
In this post and the accompanying videos, I will explain some very basic concepts, understanding of which is prerequisite to capturing good audio for your video productions. In doing so, I’ll try to avoid too much jargon and hopefully illustrate the ideas concerned in a way that’s easy to understand.
Three essential things to understand in respect of audio recording
- Sound gets quieter or attenuates with distance
- Sound is reflected by hard, flat surfaces
- Sound recording equipment does not work in the same way as human hearing, which can be extremely selective about what we hear or rather what we choose, consciously or subconsciously, to listen to.
Signal to noise ratio and microphone proximity
Signal to noise ratio (SNR) can be described as the ratio between desired or useful information and unwanted or extraneous information in a system. It is often used when describing the specification of signal paths within electronic circuitry in fields such as data transfer, audio electronics, and so on. While, as audio capturers, we are very interested in maintaining a good SNR in the electronic circuits of our equipment; we are also concerned with ensuring that the audio information we are gathering has a good (acoustic) SNR before it even enters the microphone at the start of our electronic signal chain. For example, if we think of the sound of an individual’s voice as the desired signal and all other sounds in the recording environment as noise, we have the basic parameters for maintaining a good SNR and our task is simply to capture as much voice as possible when compared to everything else.
The following photographs help us illustrate this principle, where our desired signal is the image of the toy dog (our subject’s voice) and everything else in the frame is unwanted noise. In simple terms, we need to get as much of the toy dog in the frame as we can, when compared to the other contents of the bookshelf. The photos also give us a strong hint as to how to solve this issue when working with sound, once we realise that they were taken without using zoom!

If we imagine that the toy represents our desired signal, then everything else in the frame can be regarded as noise, so this image shows a very poor signal-to-noise ratio.

By the same token, this image represents a much better signal to noise ratio, because it mostly contains our desired signal.
In short, to achieve the best SNR, we need to ensure good proximity between our microphone and our subject, an elephant in the room consideration that many novice videographers don’t seem to grasp. Instead, a very common solution to sound recording is using either the inbuilt microphones on their video cameras, DSLRs or smartphones or device mounted external mics, then wondering why the captured audio leaves so much to be desired. The simple fact is that by the time your camera is in a position to capture a well-composed scene, it’s almost certainly too far away from the subject to record audio successfully, so inbuilt or device-mounted mics are rarely a good solution for effective audio recording.
The three videos below show how sound quality changes as our microphone is placed closer to the sound source, in this case, my voice. In the first, a camera-mounted shotgun mic was used, in the second the same shotgun mic was placed considerably closer to the sound source, and in the third, the shotgun mic was deployed hand-held within 25cm of the sound source.
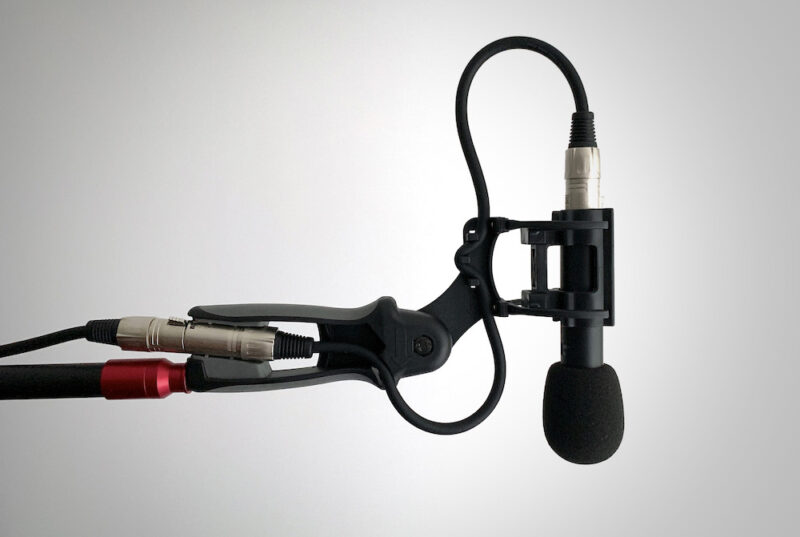
Of course, it’s not always desirable to show onscreen talent hand holding a microphone, in which case you could consider using a lavalier (lapel/tie clip) mic, with either a wired or wireless connection to your camera, which can be placed discreetly, very close to the sound source.
Room Reverb
While it’s easy to understand the necessity of good acoustic SNR in noisy outdoor environments, where traffic noise, birds singing, and even passing aircraft can play havoc with your soundtrack; indoor spaces, no matter how apparently quiet, can produce unwanted noise in the form of reverberation or reverb, which is a wash of complex audio reflections from hard surfaces like the walls, floor, and ceiling. Rather than being completely extraneous noise, reverb is generated by our target sound source, but it is still generally undesirable because it can make the onscreen sound far less intelligible than we would like.
Don’t necessarily trust your ears
One of the overarching issues involved in the misunderstanding of basic audio recording is the perception that “if it sounds alright in situ, it will sound alright on camera”. Our ears, in conjunction with our brains, are infinitely more sophisticated than even the most advanced audio equipment available; and, as a result, we can effectively mask out unwanted sounds and somehow zoom in on what we’re trying to listen to. For example, if we walk into a crowded bar, with an almost deafening array of sounds, combining speech, duke box, TV, clinking glasses, etc, we can still hold an intelligent conversation with our friends. OK, some of this is down to our proximity and therefore a more favourable SNR, but in practice, there is far more at play, as our onboard auditory computers do an incredible job of filtering out what we don’t want or need to hear.
The same thing happens in more lively acoustic environments, where somehow, we simply don’t register the confusing reverberation or even discernible echo that’s present and can happily chat to each other in comfort. However, when we want to, we can effortlessly switch off our built-in filters and enjoy the acoustic curiosities of the space we’re in. To a seasoned sound recordist, switching in and out of these two modes in order to make an assessment of an acoustic environment becomes second nature; but to the less experienced, even the issues present in a really quite awful room, acoustically speaking, may go unnoticed. Recording equipment, on the other hand, simply takes it all in, without question or prejudice, which can result in one hell of a surprise on playback!
To be fair, the audio problems with this video are made worse by the use of automatic level control during recording, but even without this, the ambient room reverb would still be very problematic.
Axis
If the idea of mic proximity can be described as an elephant in the room, in respect of rookie sound capture, the hippo in the room is the idea of microphone axis. Placing a mic on-axis to a sound source is, to put things simply, about pointing the mic at the sound, rather than anywhere else. The microphones we use for recording audio for video tend, in most cases, to be designed to be more sensitive to sound from the front than from the sides or rear. The practical upshot of this is that if they are placed pointing in the wrong direction, i.e. off-axis as opposed to being on-axis, i.e. pointing directly at the sound source; they will pick up more unwanted noise in relation to the wanted signal than is desirable. In recording studios, it has long since been the practice of good sound engineers to learn how different mics behave in terms of their on-axis and off-axis behaviour, using these to subtly colour the sounds of the instruments they are recording. Suffice it to say that for the purposes of audio recording for video, directly on-axis placement invariably works best. In general, it’s very easy to work out which is the business end of a mic, as most are a simple cylinder, with a mic element at one end and a male XLR socket at the other, some studio broadcast mics, and most large diaphragm condenser mics differ from this, however, so voiceover artists and vloggers should pay particular attention when using these.
Recording levels and safety track
As a rule of thumb, it’s wise to never use auto-recording levels on your camera or mobile device as this can result in very obvious breathing effects and over-compression that sound awful. Switch to manual recording and use your VU or sound level meters to set your recording levels to peak at around -12db. This should give you a decent amount of headroom to accommodate quite dynamic audio, while still maintaining a decent electronic signal-to-noise ratio within the signal path of your capture and recording devices (mic and camera). If you anticipate very widely fluctuating volume levels, it’s always wise to set one of your stereo recording channels about 12db lower than the other, I.e. one channel at -12db and the other at -24db. This means you have a backup track that you can cut to from time to time in post-production if sound levels get out of hand. Chances are that your main audio will be in mono anyway, particularly if this is voice-based, so you shouldn’t worry too much about losing the stereo facility.
More video production advice from the Mooma Blog.
Stourbridge-based Mooma Media offers event audio-visual support, event filming, live-streaming, video production, and still photography services to businesses, the public sector, and other non-commercial organisations throughout the Black Country and the wider West Midlands region. To discuss your project, or for a competitive quote click the button below.
Video production advice for organisations in and near:
West Midlands county: Birmingham, Solihull, Sutton Coldfield, West Bromwich, Dudley, Walsall, Wolverhampton.
Staffordshire: Lichfield, Tamworth, Stafford, Cannock,Burton upon Trent.
Shropshire: Telford, Shrewsbury, Bridgnorth, Kidderminster, Ludlow.
Worcestershire: Bromsgrove, Reditch, Droitwich, Worcester,
Warwickshire: Warwick, Stratford upon Avon, Leamington Spa, Coventry, Nuneaton,
Comments are closed