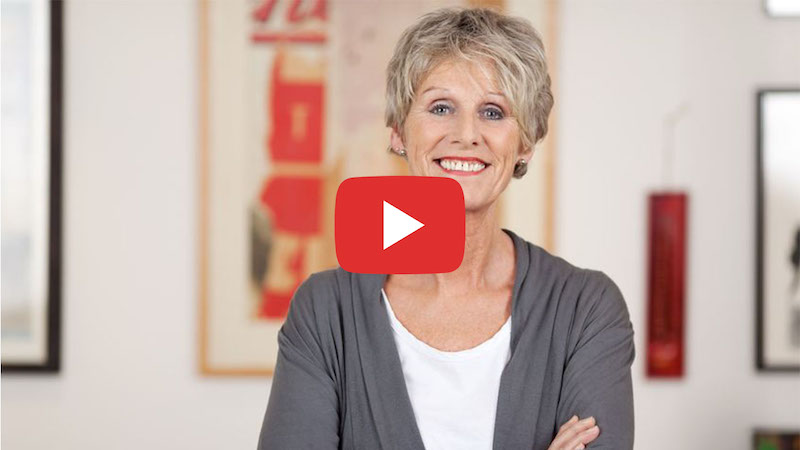
Talking head interviews are incredibly popular as promotional video products. They can be used either as standalone marketing assets or as part of a more extensive marketing video. It’s also common to see a number of separate talking heads used in one marketing film, each explaining a particular facet of a more complex organisation or product.
Producing talking head videos is relatively straightforward in essence, however, care should be taken to get the most professional result. This post deals with some of the most important considerations for creating successful talking head interviews.
In advance of the talking head interview
Preparation is crucial to any kind of promotional video production, so simply turning up and hitting record won’t give good results. Although time on location, with your interviewee, may be limited, there’s still a lot that can be done in advance.
Get to know your subject
While you may not be able to spend much time with your interviewee, prior to the interview, you can still gather information about them. Do your research, contact them or their agent by email or telephone, learn as much about them as you can. From this, you can begin to construct a basic framework or plot for the interview.
Share a list of themes that you intend to discuss, in advance. This gives them time to prepare and the reassurance that you’re not going to visit problematic territory unexpectedly. Don’t be tempted to share specific questions, however. Doing this may well stifle the interview, as they’ll be tempted to prepare a closed response. In addition, answers are likely to be more contrived, making the interview feel less authentic. There may need to be some negotiation regarding the content of the interview, but this is generally a good thing, helping to form a relationship and build trust.
Basic logistics
Ensure that basic parameters for the interview, e.g., times and location, are tied down early on in the process. Be sure to share this information with your interviewee, clearly and accurately. Failing to organise the basics makes you look amateurish, to say the least, and could even lead to crossed wires and a failed project. It’s best to communicate important information by email, as this provides a reliable record of the exchange.
Be clear about how long you expect the talking head interview to last, being sure to include contingency time. There’s nothing worse than losing your subject to another appointment when you’re one question away from success.
Technical and creative considerations you need to share
Let your interviewee know if you will be filming any B-roll: shots of them working, for example. This can be incredibly useful if you need to cut away at any point, to cover up an edit, for instance. Again, letting them know about this is basic courtesy and helps them to prepare. Alternatively, explain if you will be using two cameras, or cutting between closeup and wider shots for the same purpose. Sharing the process will give them more ownership of the situation and help to set their mind at ease.

Someone working at their desk makes the perfect b-roll.
Explain how you would like your interviewee to dress. For corporate work, this will probably mean wearing their normal work clothes to help add context. However, you will want them to avoid certain colours and you should certainly ask them to avoid tight patterns and stripes, to prevent moiré effects in your video. Everyone likes to look their best on screen, but this may be at odds with messages you want to convey about character or lifestyle. Again, it’s important to explain your ideas rather than simply expecting interviewees to be on your wavelength.
Location, location, location
Many perfectly successful talking head interviews happen in fairly nondescript environments, such as hotel conference suites or empty offices. It’s also quite popular to blur backgrounds so much that the interview location is completely unrecognisable. However, you may want to choose somewhere more specific for your interview, to give your talking head context. An executive in a spacious office, a DJ in a nightclub, or an athlete in a stadium, would all be good examples of this. Along with clothing and B-roll, the setting for your interview can be a valuable asset for telling your story. Remember that although this is a documentary or promotional video, you’re still telling a story, so using clues that help the viewer to understand key elements of that story is important.
Learn more about scouting locations.
Check you have everything you need for your talking head interview
It goes without saying that everything you require for the interview should be double-checked before you even set out. If you intend to power equipment from batteries, ensure these are fully charged and will supply enough power for the expected duration and beyond. Check you have enough memory card capacity. Carry spares when possible.
Make sure you leave plenty of time to get to your location and to set up. Don’t keep your interviewee waiting!
Learn more about pre-production
Setting up for your talking head interview
Positioning your interviewee
Positioning your interviewee in relation to their environment and positioning equipment in relation to them is important. You’re essentially painting a picture for your audience, so the elements in that picture should combine to draw their attention where you want it.
While elements in the interview location may help to paint your picture, make sure they’re not a distraction. This can be the case with bright lights, readable text, or movement in the background, for example. Colour clashes are also something to consider, which is why background colours are often muted somewhat in talking heads.
If you’re working indoors, try to avoid too much direct natural lighting in the scene. Positioning interviewees too close to a window can be difficult to balance, for example. Likewise, strong backlighting can be a problem to manage. Also be aware that natural lighting can change quickly, which will cause additional problems.
Artificial lighting
If you can deploy your own lighting this will give you considerably more creative control than relying on available light. Any number of lighting products, including ready-made interview kits, are available at a variety of price points. There are classic models for lighting interview subjects, such as standard three-point lighting, which work well in most situations. You may want to get a little more creative, however, which is fine provided you work to certain principles. Lighting should always focus attention on the interviewee, and it should never be a distraction in itself. Unless you’re looking for a specific creative effect, artificial lighting should remain pretty much invisible to the average viewer.

Classic three-point lighting. Diagram courtesy of http://www.lightingdiagrams.com
If you’re in a more run-and-gun situation and have to work with the room lighting, this should be managed as much as possible. For example, you may find there is a problematic mixture of orange tungsten and daylight LED lighting. If this is the case, compensate with colour correction filters or by switching off offending lights. Your kit should, at least, include a small portable LED panel, that can add a little fill light to your subject’s face if needed. Ideally, this should be adjustable for different colour temperatures to help match room lighting. Something like the Rotolight Neo is ideal for this.
Setting up your camera/s for the perfect talking head interview
It’s common practice to use two cameras for a talking head interview. One camera may be showing a closeup of the interviewee, while the other gives a wider shot. Alternatively, or additionally, the cameras can be set at different angles to add further interest for the viewer. Two different views of the subject also enable you to edit without fear of creating obvious and inappropriate jump-cuts. Another approach is to use a single camera, shooting a higher frame resolution than that intended for the final product. This enables reframing during editing, effectively zooming in and out to create interest and also disguise cuts.
Try to avoid inclining your cameras to any degree and thereby shooting up or down at your interviewee. Mount your cameras at their eye level as this will feel much more natural and less jarring for the viewer. This is almost certainly a documentary or promotional video production, so drama probably isn’t a requirement!
Use a good, stable tripod for each camera. Check these are properly locked off to avoid any unwanted movement during filming.
Set and double-check all aspects of your frame/s prior to starting your interview. This includes white balance and exposure, both of which should be matched as closely as possible between cameras. Focusing should be checked particularly carefully, as this is impossible to correct effectively during editing. Take a good look at each frame for distractions, checking carefully around the edges for any intrusions.
The sound is half the picture!
Audio for talking-head interviews is a subject in itself, which I’ve covered in a previous post, but I’ll go over some basics here. Remember that a talking head interview is probably part of a documentary or promotional video, so clear communication is vital.
Check your environment, in silence, listening for extraneous sound. This could include traffic noise, aircon, a refrigerator, and so on. Where possible, close windows and switch off appliances to remove as much unwanted noise as possible. Next, clap your hands hard a few times and listen to the room itself. The amount of reverberation should inform you of what kind of microphone to use and where to position it.
As a general rule, you should get your mic in as close to the sound source, your interviewee, as possible. This could involve booming a mic just above and in front of the subject or using a lavaliere/lapel mic. If you’re booming a mic, care should be taken to keep it just out of frame. Lavaliere mics are discreet and, generally speaking, no one really minds seeing them onscreen during an interview. While a boom mic gives a more natural sound, a lavaliere mic might be necessary if the acoustics are particularly poor. Consistency of approach will avoid unsettling audio changes between different Interviews used in the same production.
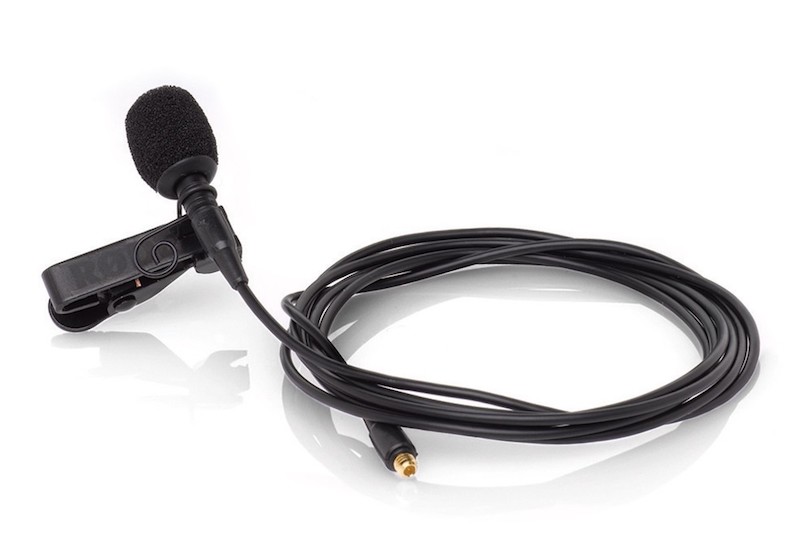
The Rode Lavalier Microphone. Typical of its type.
Learn more about choosing the right mic.
Chat with your interviewee.
During much of the setup, your interviewee will be sat or stood waiting for you. This can be a tense time for them, particularly if they are a novice. Chat with them as you work and go over how things will run. In particular, reassure them that, because the interview will be edited, it will be OK to stop and start or to repeat questions. Once your mic is set up, make the conversation two-way, so that you can soundcheck as they’re speaking. This is so much more useful than the customary one-two, one-two that everyone thinks constitutes an adequate sound check.
Use this time to establish a routine for cueing the start and end of a take. This helps to ensure you have enough in and out time for editing.
Finally, ask some dummy questions to enable them to warm up. Ask them to tell you about their journey to the interview or ask about their most recent holiday. When you think they’re ready, give them a smile and ask politely if they’d like to begin.
During your talking head interviews
Monitoring sound over headphones throughout is good practice, as you will then hear exactly what is being recorded. Equally, while your interviewee is responding to each question, try to watch your video monitor carefully. Doing this avoids nasty surprises later and possibly having to call your interviewee back to reshoot something.
Keep a notepad and pencil handy during the interview to jot down anything that might invite further questions. There may also be points that you feel require clarification.
Of course, in a larger production team, each job would be handled by an individual concentrating on a particular task. For smaller teams and solo shooters, everything rests on one person’s shoulders, so multitasking is key.
Check the status of your equipment periodically. During longer interviews battery status or memory card space may become an issue, so don’t get taken by surprise.
Remain courteous throughout the process, even if you feel the need to pressure your interviewee, for whatever reason. Remember that you won’t get the best from the situation by being arrogant or becoming a bully.
And finally
After the interview has ended, thank your interviewee for their time. Depending upon their experience, they’re likely to be concerned about the quality of their performance, so reassure them. Chat about the interview and show interest in what was discussed. Let them know when you expect the finished interview to be available. Leaving a favourable impression could mean the difference between a recommendation and/or repeat commission and not!
Find out more about my video production services.
Stourbridge-based Mooma Media offers event audio-visual support, event filming, live-streaming, video production, and still photography services to businesses, the public sector, and other non-commercial organisations throughout the Black Country and the wider West Midlands region. To discuss your project, or for a competitive quote click the button below.
Talking head interviews for businesses, public sector, and other non-commercial organisations in and near:
West Midlands county: Birmingham, Solihull, Sutton Coldfield, West Bromwich, Dudley, Walsall, Wolverhampton.
Staffordshire: Lichfield, Tamworth, Stafford, Cannock,Burton upon Trent.
Shropshire: Telford, Shrewsbury, Bridgnorth, Kidderminster, Ludlow.
Worcestershire: Bromsgrove, Reditch, Droitwich, Worcester,
Warwickshire: Warwick, Stratford upon Avon, Leamington Spa, Coventry, Nuneaton,
Comments are closed