Live streaming for schools. In this post, I’ll look at the practicalities of setting yourself up to live stream a concert, play, musical, or presentation event.
Any new school year brings with it new challenges, non more so than in 2020. Schools face unprecedented restrictions on their activities, due to COVID social distancing rules. As we begin the Autumn term, many schools would normally be planning public events for later in the year. These might include presentation evenings, speech days, recital evenings, and so on. As things stand, the expectation that these can go ahead is probably close to nonexistent. However, just as people have learned to meet online, schools can turn to the internet for a solution!
Events that have been open to the public in the past can now be broadcast online via live internet streaming. Online video platforms, including YouTube and Facebook, offer free-to-use streaming channels. These can be used by schools to invite a virtual audience to their events. All that’s needed to do this, in theory at least, is a stable internet connection and a mobile phone or tablet. However, we need to take things a little further to produce a professional-looking and sounding broadcast.
What do you need for a school live stream?
If you want to take your school live stream to the next level, you’ll need a decent video-capable camera. This will need to have an external mic input socket and an HDMI output. Some consumer-grade camcorders, DSLRs, and mirrorless cameras don’t have an external mic input. This means you need to check their specification list for connectivity before purchase. These devices are infinitely more suitable for the job than mobile devices. An external mic input is important. This is because even a relatively cheap external mic will give far better results than one built into a camera.
A word on mic placement.
A camera-mounted external mic will definitely improve sound quality over a built-in mic. However, if your camera is more distant from the stage the mic will pick up a lot of room reverb. Having lots of reverb makes your sound less intelligible, so it is best avoided. Ideally, you should get the mic in as close to the action as possible. This means purchasing a stand of some sort and a suitable mic cable to connect the mic to your camera. Another way of achieving the same result is to take a line out from your house PA system if you’re using one.
In addition to a camera and external mic, you will also need some kind of video capture device. This converts your camera’s HDMI video signal to USB, which can then be fed into a laptop. Your video camera or DSLR is now effectively a webcam. The Datavideo Cap-2 is a perfect example of this sort of device. From here you can easily connect to a streaming service like YouTube or Facebook Live.
Using OBS software for your school live stream.
If you want to get even more advanced you could install OBS (Open Broadcast Software) on your laptop. OBS is open-source software, meaning it’s free to download from here. Don’t be put off by OBS being free; it’s a powerful application that does its job very well indeed. OBS also has a vibrant user community, so if you get stuck there are plenty of people to turn to for help. Setup instructions for OBS can be found here. OBS lets you add other elements to the screen, your school badge or lower thirds text, for example.
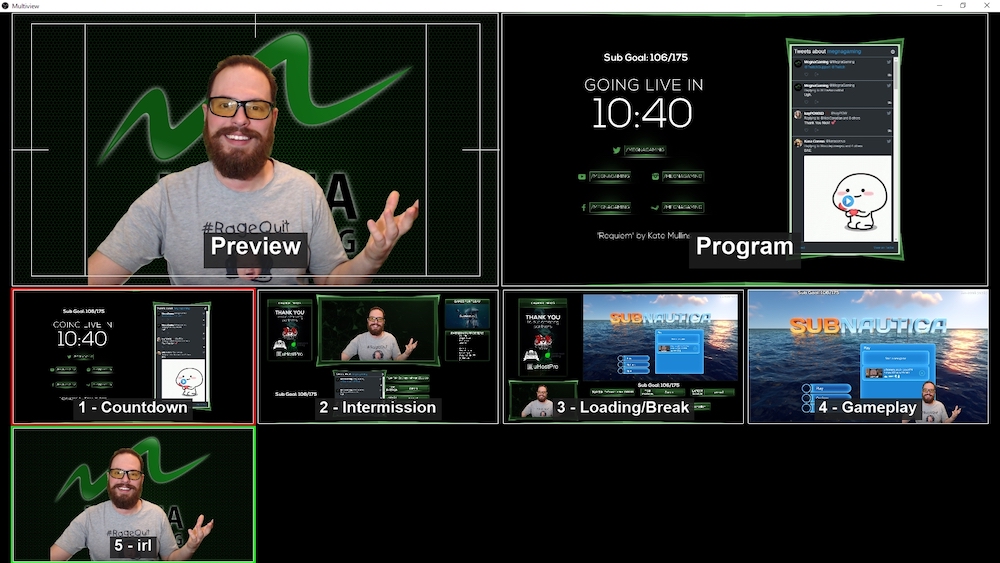
OBS (Open Broadcast Software) turns your laptop into a very capable production suite.
Audio sync pitfalls
You could plug a mic directly into your laptop rather than going via your camera. However, this usually causes synchronisation issues, as video processing introduces latency (delay) to the video signal. This delay can be compensated for in OBS by delaying the audio so that it matches. However, this adds a whole level of complexity that you could probably do without. It’s easier to have the audio signal already embedded in your HDMI feed. This means that it arrives at your laptop in sync with the video signal.
So, you should now have a setup that looks something like this:

Streaming to YouTube

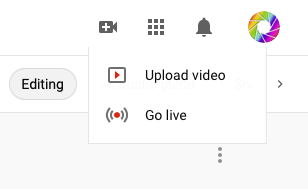
Next, you need to connect your computer to the internet and log into your host platform account. The Youtube streaming page can be found by clicking on the “Create” icon at the top of your YouTube account’s main page, then clicking “Go Live”.
Next, you choose whether to start your stream right away or to set a start time in the future. This is followed by the option of either using a webcam or using software (OBS).
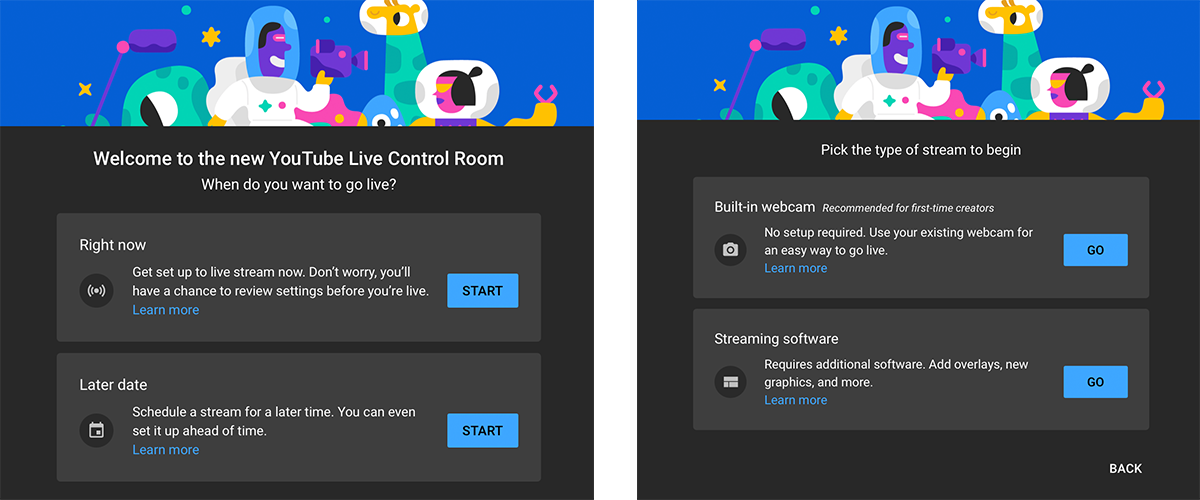
If you chose the webcam option your school live stream will start immediately. If you choose the software option, you’re then taken to the screen shown below.
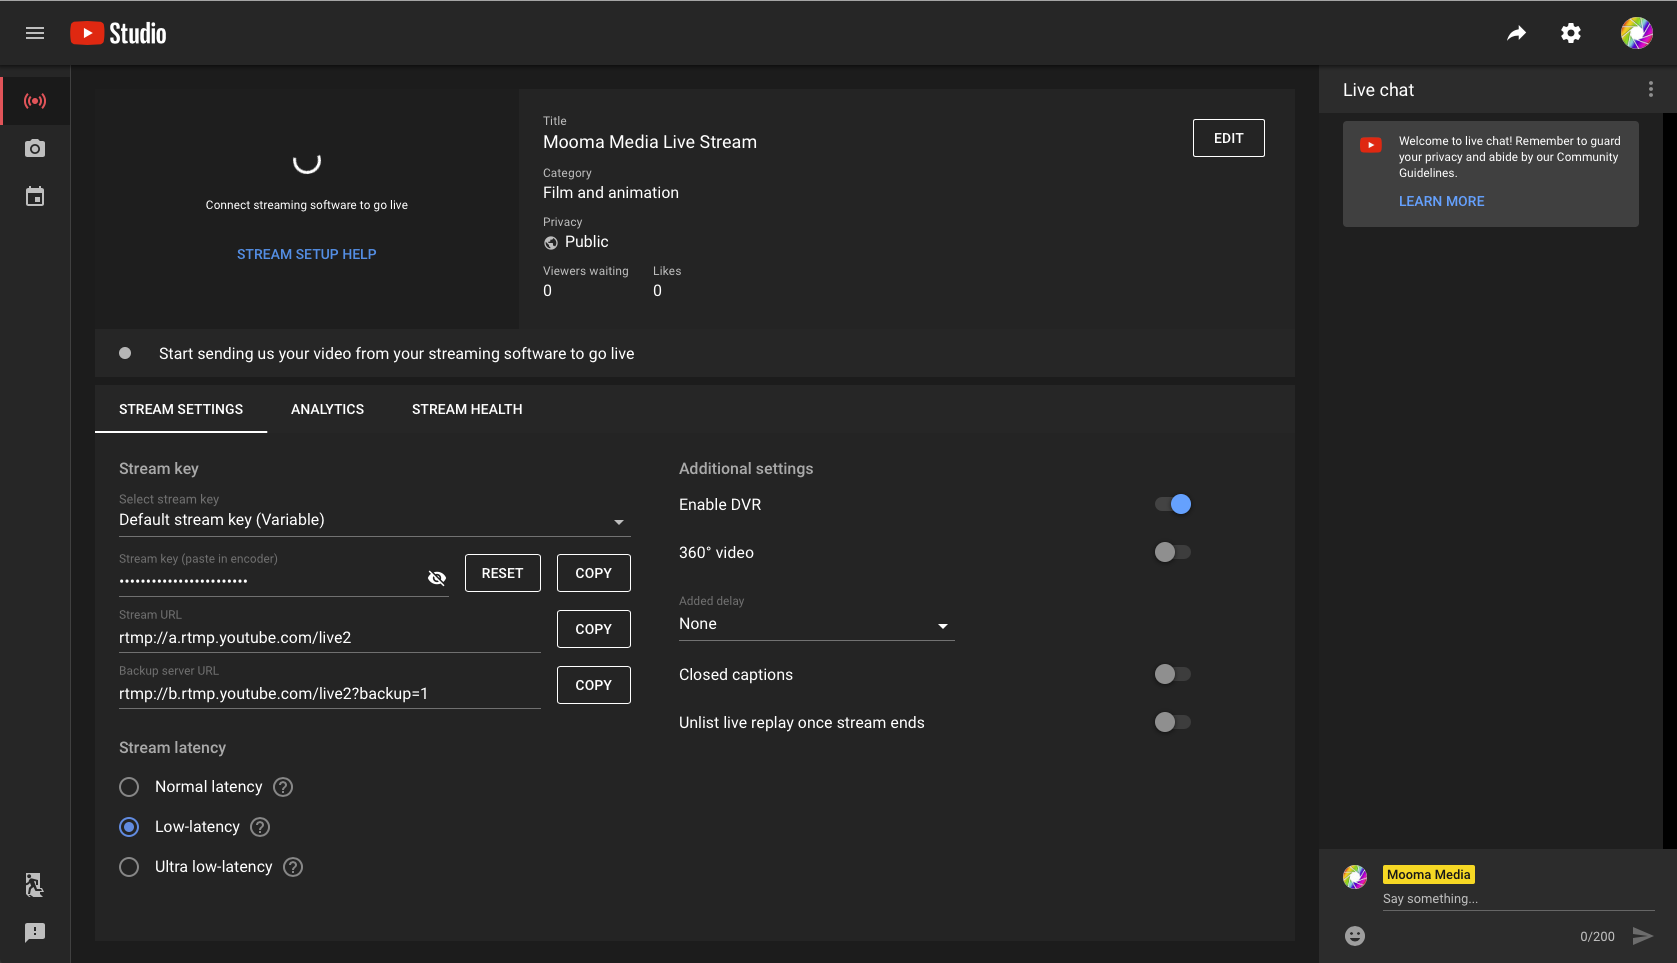
Streaming from OBS.
All you need to do is enter the stream address and stream key into your OBS software and you can go live. Before doing this, however, make sure you change the privacy setting to “unlisted”. This is a bit like making a telephone line ex-directory and only people with the stream address will be able to find it. The stream address can be emailed out to parents in advance, along with the start time. Likewise, you can “unlist” the recorded video once the stream has ended. Don’t be tempted to select “private” as this requires viewers to be logged in to your YouTube account. The video is recorded as you stream and can be viewed later if this fits in with parents’ schedules. Alternatively, you can delete it.
Other platforms for your school live stream.
The streaming process for Facebook and for other platforms is very similar, requiring very little setup time or technical knowledge.
Run a test stream.
Before broadcasting your school live stream, it’s worth checking that all of your settings are working well. Don’t be tempted to stream at very high definitions or bit rates as a) most viewers will probably be watching on a mobile device, where 4K and even 1080p are wasted, and b) this requires greater bandwidth and is more prone to dropouts if demand on your internet connection is high. 720p will almost certainly suffice. To ensure the most stable connection, ethernet will always be preferable to WiFi, which is another reason to avoid using mobile devices if possible.
Getting the most from your live stream
If you want to take your school live stream further, you can add more cameras to your setup. Each camera will need its own video capture device and its own USB port. With multiple cameras, you can easily switch between different camera angles to create a really immersive viewing experience. In addition, you could mix in photos or pre-recorded video from your laptop, add lower thirds subtitles, create picture-in-picture scenes with two camera feeds; in fact, the only limits are your imagination and your laptop’s processing capabilities.
Have fun!
Learn more about my live streaming services for schools.
Stourbridge-based Mooma Media offers event audio-visual support, event filming, live-streaming, video production, and still photography services to businesses, the public sector, and other non-commercial organisations throughout the Black Country and the wider West Midlands region. To discuss your project, or for a competitive quote click the button below.
Live filming and webcasting services for schools in and near:
West Midlands county: Birmingham, Solihull, Sutton Coldfield, West Bromwich, Dudley, Walsall, Wolverhampton.
Staffordshire: Lichfield, Tamworth, Stafford, Cannock,Burton upon Trent.
Shropshire: Telford, Shrewsbury, Bridgnorth, Kidderminster, Ludlow.
Worcestershire: Bromsgrove, Reditch, Droitwich, Worcester,
Warwickshire: Warwick, Stratford upon Avon, Leamington Spa, Coventry, Nuneaton,
Comments are closed